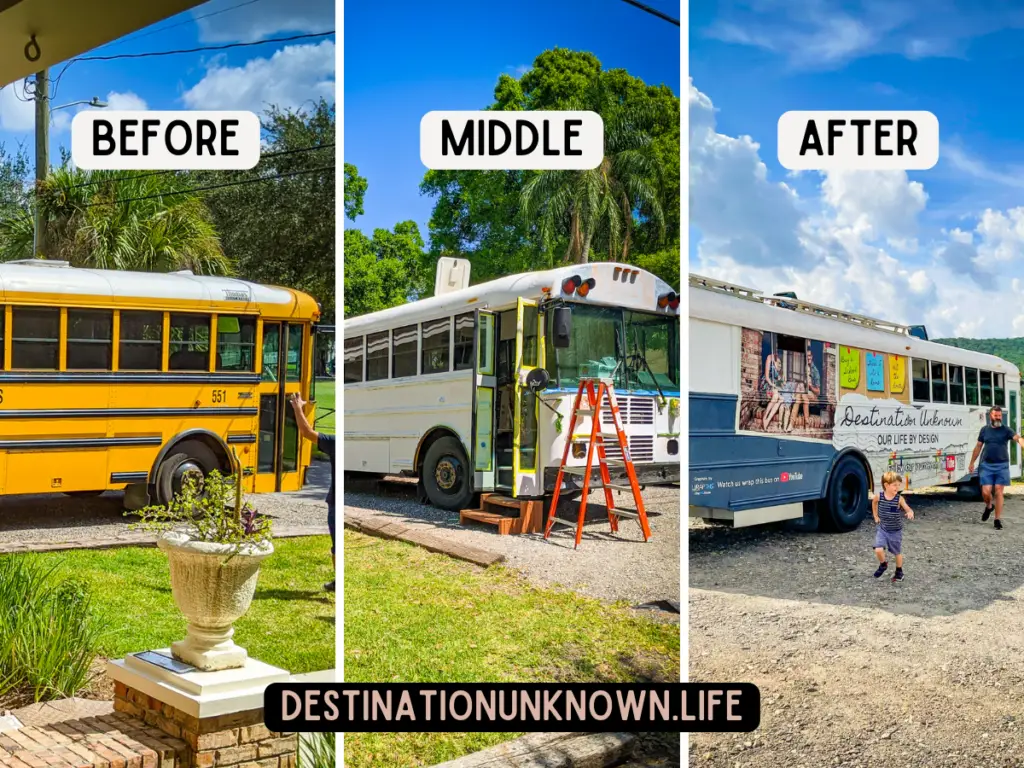
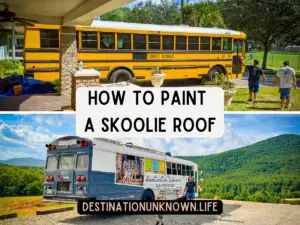
An excellent paint job definitely makes a big first impression, so we wanted to do it right. In this blog, I detail how to paint a
In 2021, I set to work prepping the exterior of our school bus conversion for priming and painting after weeks of researching the forums. It was a massive job for one person to accomplish (though I did have some helping hands along the way thanks to my husband and neighbor Joe).
I’m so happy it’s done and the end result is nice. Additionally, the products and preparation paid off because the finish is still intact today, even in hot Florida weather.
Are you going deep into the rabbit hole on
- How to paint your skoolie roof
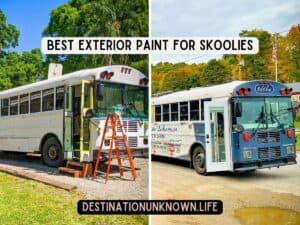
- Best Exterior Skoolie Paint
- Skoolie supply list to build a rig like ours
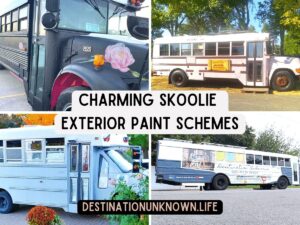
- 6 Charming Exterior Skoolie Paint Schemes
Disclosure: Some of the links in this article may be affiliate links, which can provide compensation to me at no cost to you if you decide to purchase a paid plan. Thank you, if you do. As an Amazon Associate I earn from qualifying purchases. This site is not intended to provide financial advice and is for entertainment only. Read our affiliate disclosure in our privacy policy.
How to Paint a Skoolie Exterior
Skill Level Needed
I believe that this is a job that a beginner skill level can accomplish, though it does go faster with more experience.
At the time I did this job, I was a 34 years old and 6 months post-partum from my third child. I wore her on my back when I did some of the exterior work. If I can do it, anyone can.
Prepare the Skoolie Exterior Body for Primer and Paint
We have a 37-foot
Find our entire supply list in this blog.
Remove and Delete Any Items that Won’t Remain on the Bus
Preparing the bus for primer is, by far, one of the most timely projects we took on during our bus conversion. We purchased our retired school bus directly from a school board in Tennessee, and we had to remove all the reflective tape and vinyl decals on the bus, flashers on top, and the extendable stop sign on the driver’s side of the bus.
We did not remove the flashers on our roof, since we took out the electrical that powered them.
If you’re planning to delete any windows in your rig, then complete this project before moving on to exterior prep for paint, unless you’re willing to touch up some areas after that work is done.
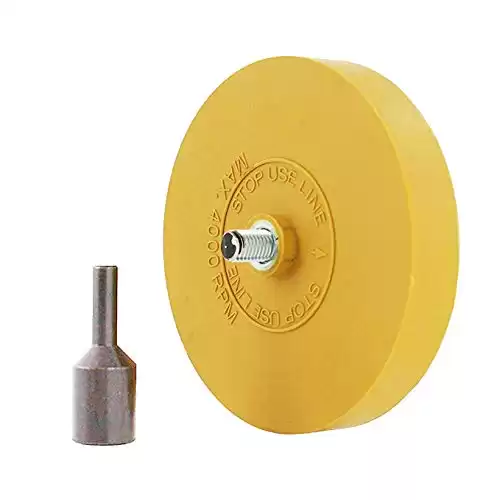
Remove the Vinyl Decals
To remove the vinyl decals, we purchased a rubber wheel on a drill bit that we attached to our drill. That made fast work of any vinyl decals and left a smooth finish. The rubber smelled slightly of vanilla, so it was one of the better smelling projects.
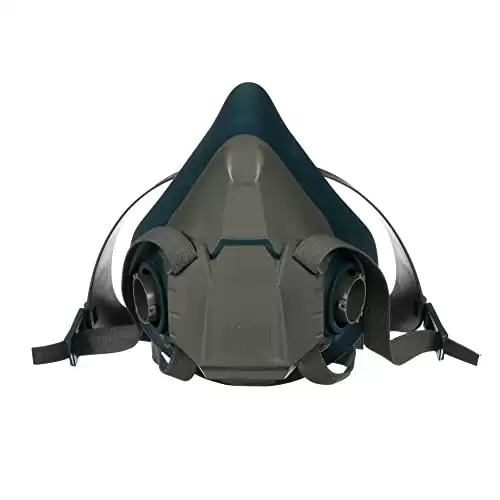
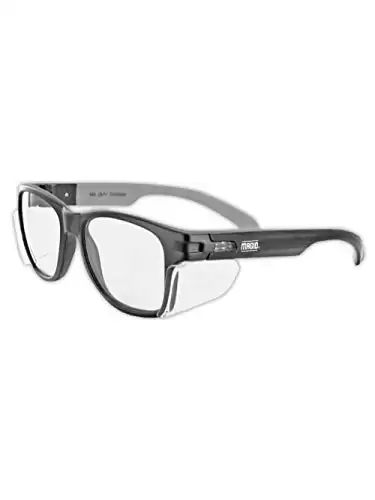
I recommend wearing a mask and protective eye gear during this process because the rubber shreds away into fine particles.
Remove the Reflective Tape
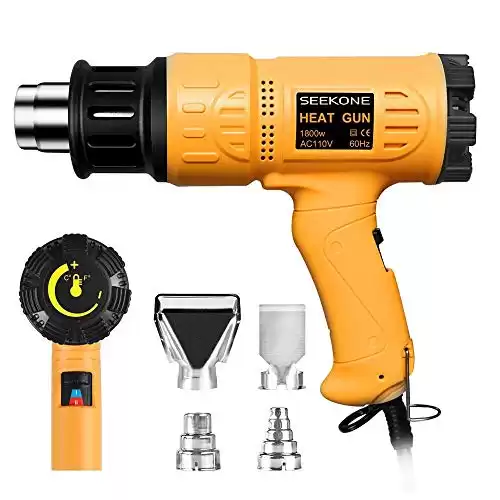
To remove the reflective tape, I used a heat gun and heavy duty scraper on the initial pass. Wear gloves because the melted tape gets very hot and sticky and the heat gun gets hot, of course.
The melted tape and its adhesive don’t smell great, so you may want to wear a mask too, especially if you’re working indoors.
Once the reflective tape has been removed, then you will want to remove any remaining adhesive. I found the best product was 100% pure acetone and a razor blade scraper. I recommend purchasing the acetone in a 1 gallon container that you can get from the paint section of your home improvement store, rather than the small containers you would find at the supermarket. You’re going to need a lot of the stuff. Goo Gone was not effective for me, even after letting it soak into the adhesive.
Once the thick chunks or goo balls are gone, then you can do a final pass with acetone. Your goal is to get rid of all the big sticky areas so you can sand the surface without gumming up the sanding pad.
Caulk the Body Exterior
Once all the adhesive residue is off the bus, go around the entire bus and do preventative treatment on the windows and seams, and any areas where holes have been cut. The goal here is to prevent water intrusion.
We removed all the old filler and caulk around the windows and replaced it with a new paintable product specific for automotive use. We added the same automotive caulk on the seams of the newly installed sheets of metal for the windows that we had deleted.
This wasn’t my favorite product because it dried very quickly and didn’t smooth the same way that a caulk would; however, it is a well-rated automotive product made for use on metal surfaces. It did sand down to a smoother finish. We had to special order this product from an automotive store since our local branch didn’t carry it in stock (during the pandemic).
Sand the Exterior
Next, we sanded the entire body of the bus. I primarily used a hand-held orbital sander with 80 to 120 grit sandpaper. In the hard-to-reach places, I would use a sanding block.
For the previously painted areas, the sanding goal was too lightly scuff up the existing body coat so when we applied primer, it would stick a little better.
If there were any areas of rust, we sanded and treated it with a Rust-Oleum product.
Treat the Body for Rust
On the areas where we had unpainted stainless steel, like where we had replaced or deleted windows, these metal sheets began to rust within days of installation. We lightly sanded the unpainted metal and sprayed a rust-preventative paint so the rust would not progress during the time it took me to prep the rest of the bus for paint.
On the areas of our bus that had been previously painted, like the body and rails, we did not experience any rusting in these areas.
Wash, Scrub, and Rinse a Few Times
Finally, we gave the bus a good bath and scrub with Evergreen cleaning solution. I highly recommend using a scrubby with an extendable pole so you don’t have to get up and down the ladder.
Rinse the bus a few times, especially the pockets around the window frames, to remove any dust and residue. You’ll want as clean of a surface as possible when you go to prime and paint the exterior of your rig.
Remove light fixture covers and tape off decorative elements
There is usually a cover or frame that trims out your headlamps, specifically. I recommend removing those completely since they come off with screws. For other fixed elements, tape those off and wrap with plastic.
How Long Does it Take to Prepare a Skoolie Exterior for Paint?
For a bus of our size, it took about 25 hours to prep the bus for exterior paint. The removal of the vinyl decal, reflective tape, and adhesive residue took 10 hours. Removing the old caulk and re-caulking the windows and deleted window sockets took about 5 hours. Sanding the bus took about 5 hours. Scrubbing and rinsing the bus took about 3 hours.
Paint the Skoolie Exterior Body
Now on to the fun part!
It’s worth noting that we worked in our driveway, out in the open. Our bus was not covered. As soon as we finished the wash of the exterior at the prep stage, we moved right on to the priming and painting.
Prime the Body
We primed our bus exterior with Rust-Oleum white metal primer that we purchased at our local hardware store. We also purchased a few spray cans of Rustoleum metal primer to help us do any quick touch-ups or hit those hard-to-reach spaces. We primed our bus with two coats on the treated metal, and three coats on the untreated metal.
We used a fine nap foam roller and foam brushes to apply the primer. These were recommended to us for smooth surfaces and metal finishes.
Paint the Body
We used a tintable oil-based enamel made by Valspar. We decided to use this enamel because it was recommended for the exterior, rust protection, all-weather, and metal surfaces.
How long does it take to paint a skoolie exterior?
It is reasonable to say that 65% of the time will be spent on exterior prep work before paint and 35% will be spent on painting. In total, we spent 40 hours to paint our 37 foot
There are a lot of nooks and crannies that you have to cut in first, and then we did multiple coats of both primer and paint to reach our desired finish.
Skoolie Paint Supply List
Below is a list of supplies you’ll need to complete your
- Paint rollers
- Foam naps (recommended nap for a smooth or metal surface)
- Extension pole
- Foam paint brushes (assorted sizes)
- Painters tape
- Cardboard
- Painters paper
- Dropcloth (optional)
- Oil-based paint
- Oil-based primer
- Spraypaint metal primer
- Elastomeric white paint (roof only)
How much exterior body paint did we use?
We purchased one 5-gallon container of Rustoleum white metal primer and one 5-gallon of tintable Valspar Anti-Rust Armor Enamel (oil base). We used about 4 gallons of each type of product on the body of our rig.
For details on what we purchased for our roof, read this blog.
How do I calculate how much paint I need for my Skoolie exterior?
We recommend using a paint calculator to determine how much primer and paint enamel you will need to paint your school bus conversion.
Sherwin Williams has a paint calculator and I’ve linked that below.
Cost to Paint a Skoolie Exterior
In total, we spent approximately $400 to paint our 37-foot
Paint Roll vs. Paint Spray a Skoolie Body
Many in the
Conclusion
What products did you use on your rig? Let me know in the comments.


[…] How to paint a skoolie exterior […]