Have you ever wondered “Do you need a CDL to drive a skoolie registered in Florida?”
If you’ve ever wondered “Do you need a CDL to drive a skoolie registered in Florida?,” then you are not alone!
One of the most common questions I read on forums from new skoolie owners or those looking to purchase a school bus for conversion is “is a special or commercial drivers license needed to operate my skoolie registered in Florida?” We dive into that question and some related ones in this blog.
Florida is the state of sunshine, beaches, and is very RV- and Skoolie-friendly. Thus the state is perfectly optimized for the RV and skoolie community on a year-round basis!
Table of Contents
Do you need a commercial driver’s license to drive a skoolie registered in Florida?
If your skoolie is registered as a motorhome in Florida, then you do not need to have a special driver’s license or commercial driver’s license (CDL) to drive. A recreational vehicle for personal use does not require a CDL in Florida. Though a school bus is a former commercial vehicle, if you have already turned it into a recreational vehicle (motorhome), then it is not a commercial vehicle.
You can find the official statement on the CDL exemption of a recreational vehicle by the Florida Highway Safety and Motor Vehicles below, including a source link to the full article.
Do I need a CDL if my skoolie is partially or fully converted but not yet titled as a motorhome in Florida?
Honestly, this is a little bit of a gray area. If it’s obvious that the school bus can no longer be used to carry passengers (seats are removed), the words “school bus” on the exterior have been covered, removal of flashers on top (if any) and the stop sign arm, you are probably fine though the response not be legally correct. [Read further to see what we did.]
In my research on this topic, I’ve been unable to under a specific legal response to this topic from the state of Florida.
Our personal experience
My husband did not have a CDL to drive our decommissioned school bus from its purchase point in Tennessee to Florida. The school board that we purchased the bus from had spray-painted the name of the school county off.
At no point during the time that we were getting temporary Florida tags on our decommissioned school bus or when we actually updated the title to reflect “motorhome” instead of “bus” on the title were we personally ever asked if we had a CDL to drive it by the two Hillsborough County DMVs we visited. That’s been the common theme during our Florida-specific research on this topic.
Disclaimer: We discuss what we did to feel comfortable driving our decommissioned school bus without a CDL from Tennessee to Florida. Do your own research to gain your own level of comfort over your choices. We are not advising you to do the same.
Speak with the DMV for special cases on driving a non-commercial school bus
School buses aren’t the only things that get converted in Florida so the DMV and Tax Departments probably have some special rules or advisements that aren’t publicly available due to the infrequency of the topic. Certainly, when we spoke with Hillsborough County Tax & DMV management by email, they easily gave us the information that we otherwise found conflicting or just unable online or at the local branches by service desk employees.
As such, I would recommend requesting to contact the tax collector or DMV management on this topic in your Florida county.
Read this blog on how we updated our skoolie title from a “bus” to a “motorhome” and what those easy requirements were.
What if my skoolie weighs over 26,001 pounds and is registered as a motorhome in Florida?
According to the Florida Highway Safety and Motor Vehicles website, you need a non-commercial Class E driver’s license (this is the standard drivers license most drivers have) to operate a motorhome registered in the state of Florida, even if the Gross Vehicle Weight Rating (GVWR) qualifies exceeds 26,001 pounds.
A motorhome is excluded from the Commercial Driver’s License (CDL) requirements, even if the GVWR is exceeded.
Read this blog for tips on how to weigh your skoolie.
Can I drive my skoolie in Florida without a commercial driver’s license (CDL) if the vehicle is registered in another state?
Yes, if you are driving a school bus conversion motorhome in Florida, you do not need a commercial driver’s license to operate the vehicle.
However, your license and registration should conform to the rules of your DMV in the state that your vehicle is registered, if different than Florida. A special license or CDL may be needed for skoolies registered in other states depending on factors such as air brakes.
Where can I find information on the driver’s license requirements for skoolies in Florida?
Your skoolie is classified (or will be classified) as a motorhome. Visit the website for the Florida Highway Safety and Motor Vehicles for the frequently asked questions on what the driver’s license requirements for motorhomes are in the state of Florida.
How do you register a school bus conversion as a motorhome in Florida?
If you want to know how to register your school bus conversion as a motorhome in Florida, then read this detailed blog.
It quite literally took us 10 minutes and two checkboxes on a piece of paper to register our skoolie as an RV in the state of Florida.
Conclusion
In Florida, those that have a school bus conversion titled as a motorhome, you don’t need a CDL to drive your rig.
There is unfortunately a gray area on whether you need a CDL or not in the time that you convert your school bus into a motorhome in Florida. Maybe the correct response is “yes, you need a CDL” even if it is a decommissioned school bus, but I really recommend speaking to DMV and Tax Authority management in your local Florida county for the official response. For us, we didn’t bother getting a CDL.
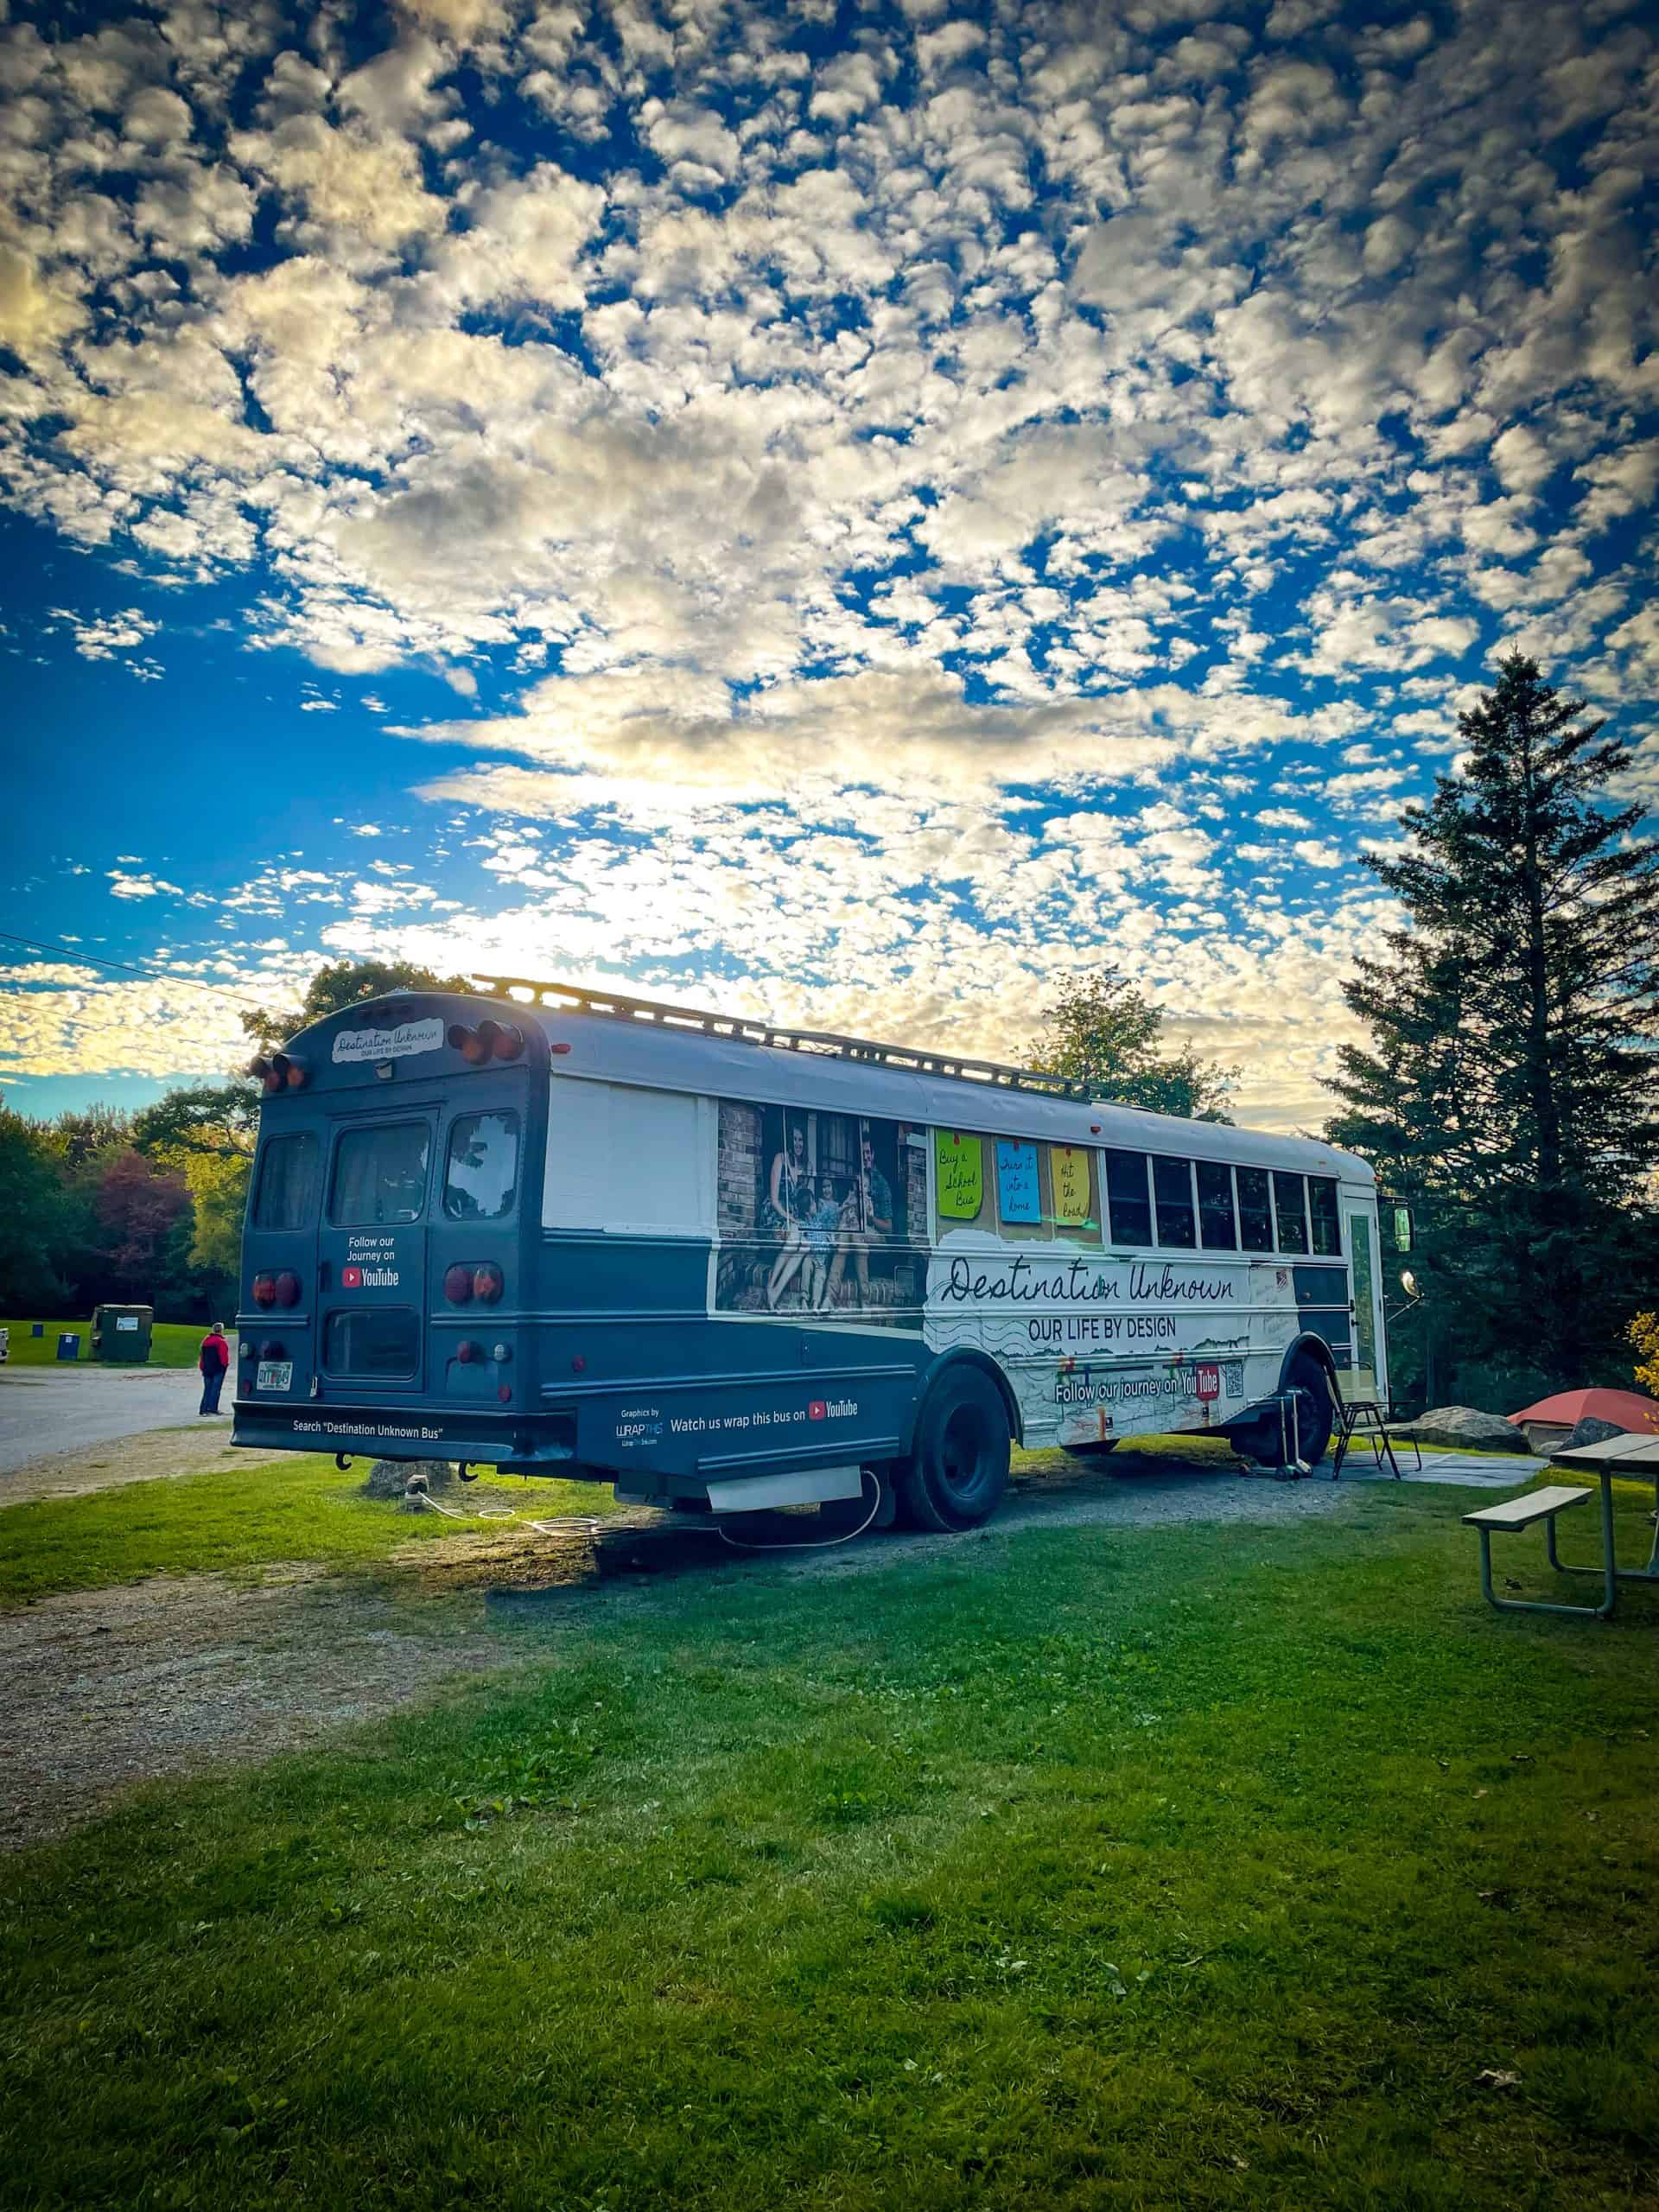
We are selling our skoolie, lovingly called the HildeBus. This blog details out the custom features, upgrades, and service history of our tiny home on wheels.
In summer 2021, we make a vertical format skoolie video tour that is under 1 minute long. Watch it here!
How to Buy our Skoolie
Price
$65,000
Contract
If a buyer wishes to purchase the HildeBus, the seller and buyer will sign a contract detailing the terms of the sale and transfer of the skoolie, license and registration.
The buyer is responsible to transfer the title and registration at her own DMV, and transferring insurance to her name (or choosing a different provider). The seller will cancel insurance on the day of sale since they are no longer owners of the vehicle.
Down-payment
To secure interest, a non-refundable security deposit is needed of 10% of the purchase price from the buyer.
Payment
The buyer is responsible to obtain funding, whether that be cash or private loan. Wire payments are the preferred method of payment transfer due to simplicity.
How to Reach Us
If you would like to reach us about touring our skoolie for purchase or hosting us as a long-term AirBnB on your property, please email us at Hello@DestinationUnknown.life.
History of the HildeBus
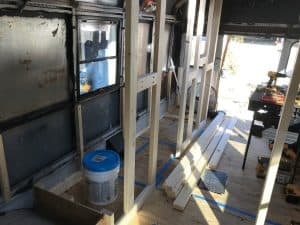
We purchased our retired school bus at government auction from a school district in Tennessee at the end of September 2020. We started demolition of the interior in October 2020 and officially hit the road in May 2021.
Eric (husband) did the majority of the demolition and build by himself with no construction background – we were fortunate to have help of many friends, family and neighbors who had expertise in construction, carpentry, painting, and electrical. Truly, we may not have finished this project at times without the help of others, and we appreciate that more than they may ever know.
Build safety
Build safety and quality were important to us since our family of five would be living on board full-time. Eric hired several professions to inspect the major systems at both the rough-in and finishing stages to ensure safety for our family.
Eric adhered to RV build code as much as possible, since the code was set in place by industry professionals.
The major systems that he built were:
Plumbing
Electrical
Solar
A/C
Liquid Propane
Read this blog if you want to know more about buying a used school bus for a skoolie renovation.
Features and Upgrades of our skoolie
Her features and upgrades will be categorized according to 5 main points: plumbing, electrical & solar, propane, AC, mechanical and then a general category (framing, paint, etc).
Any framing and products installed were done between December 2020 to May 2021, and only put into full-time service during May 2021 to October 2021. This build is lightly used.
Plumbing
We ran flexible CPVC (pex) piping for our cold and hot water lines. We ran white PVC flexible pipe for our waste water lines (from kitchen sink and bathroom areas, including urine diverter at toilet). Eric hired a licensed plumber to inspect this system at rough-in and final. No leaks were found or have since occured.
We purchased two 100-gallon tanks: one for fresh water and one for gray water. The gray water tank is mounted underneath our bus (read the gray water tank blog here). The fresh water tank, pump, and accumulator is located under our bed in the rear bedroom or captains quarters (read the fresh water tank blog).
The on-demand water heater is also installed in the rear bedroom. Read that water heater blog.
Read about how we built out and waterproofed our shower here in this blog.
In the cabinet holding the pump and accumulator, there is also a manual release valve for the fresh water tank, which release under the bus. To access this area, you’ll need to remove the screws to the panel.
To fill the fresh water tank, we have inlets installed on the right rear exterior.
We have 2 water filtration systems:
Before water enters the fresh water tank, with an in-line filter
At the kitchen sink, to filter drinking water
Electrical and solar
12V
We optimized our build to run predominantly on a 30 amp 12V system for lighting and fans, since that is the power produced directly from solar energy.
We used a marine grade wire, made for specific use in mobile or moving application.
Items running on 12V:
LED puck lights in ceiling (on dimmer switches)
LED lights in bunks
12V Retro-inspired fridge by Unique appliances (made for mobile application)
Two ceiling vent fans (living room and bunk cabin)
110V
We ran 110V wiring for those normal kitchen appliances or plugging in a computer, for example. These outlets are located primarily in the living room and kitchen. The 110V outlets are tamper resistant and two offer USB-C and USB-A charging capability.
Solar
We installed the following:
Six 205 watt mono crystalline solar panel to the roof using brackets that can be adjusted if needed
Victron 3000 inverter/charger
BMV 700
Alternator charger equipment (not installed but included)
Four 100 amp hour Battle Born batteries
Charge monitor (installed in bunk bed corridor on wall)
Generators
We purchased two 750 watt gas generators from Harbor Freight in June 2021. We run them in tandem to power our AC when we are not tied in to the grid.
These are included in the sale.
Liquid Propane
In May 2021, Eric ran black pipe for our liquid propane (LP) system and tested for leaks at all connection points. The entry into the bus begins in the exterior under-mount storage bin located under the cabinets near the kitchen sink & range.
We only have LP lines running along the right side of the bus, which is where the appliances are located that need this service.
We carry two 20 pound propane tanks in the under-mount storage bin, and that lasts our family of five about 3 months before needing to be refilled.
Appliances using liquid propane gas:
Dickinson Marine Heater in living room
Unique off-grid range (oven, convection oven & cooktop) in kitchen
On-demand, ventless hot water heater (read that blog) in captain’s quarters [aka. rear bedroom]
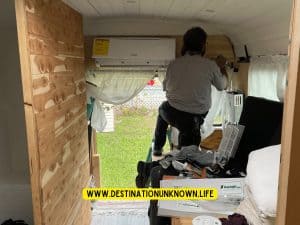
Air conditioning
The compressor is mounted underneath the bus with a screen to limit debris. The air handler is mounted in the rear of the bus in the captain’s quarters.
A licensed HVAC technician in Cutler Bay, Miami connected our mini-split air condition system.
Mechanical & Service History
Prior to the purchase of the bus (September 2020), we had a mechanical inspection performed, and relied on the service reports from the school system. Immediately after the purchase in Tennessee, Eric took the bus to a second mechanic at the bus manufacture (Thomas Built Buses).
In April 2021, a mobile mechanic performed an oil change and mechanical inspection.
In June 2021, we had our rear air brakes and one new rear tire installed in Cutler Bay, Miami by a mobile mechanic.
In August 2021, we had engine maintenance done in Worcester, Massachusetts. They fixed a radiator leak then.
General
Bus specifications
Length: 37 foot; Width: 8.5″ with side mirrors pushed in
Exterior Height: between 10 to 11 feet
Interior Height: 6.5 feet in the center
Engine: Cummins 5.9L
Transmission: Allison 2000
Mileage: ~215,000 miles
Weight: ~25,000 pounds
Title & Insurance
The HildeBus is titled as a motorhome in the state of Florida. As such, she is fully insured.
To this day, I’m obsessed by our beautiful and functional kitchen space. I go into more detail on our skoolie kitchen in this blog here.
Features of our kitchen:
Quartzite counters in light gray and white
Custom solid wood cabinets in gray-blue
Breakfast bar seating with storage
Vertical deep pantry storage with bread storage on top
Retro-looking appliances by Unique optimized for mobile dwelling
Fridge is powered by 12V
Range uses liquid propane gas
Single-basin stainless steel sink
Chef-style faucet, which doubles as an outdoor shower
Marble and gold tile backsplash
Cedar accents
Vinyl (not wood) window sills to limit bacteria growth
Living room
The couch is 7 feet long, which is great for a big family. It features deep storage underneath and can pull out to be a twin sized bed. The cushions are 4 inch upholstery grade foam. The couch has been installed with car seat mounting brackets as you can read in this blog.
Attached to the couch (front of the bus) is a shoe storage space inlaid with antique heart of pine.
The two captains chairs are black leather on a swivel base and can be reclined.
We installed a liquid propane Dickinson marine heater with chimney between the two captains chairs, as a focal point.
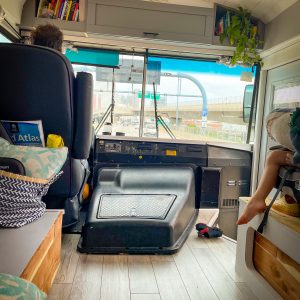
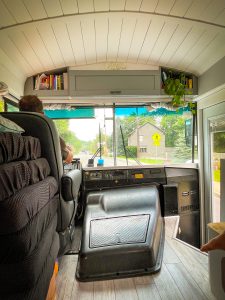
Above the driver’s chair (front of bus), we installed bookshelves and a horizontal cabinet for additional storage. We also built a dash board with two cupholders.
Though the switches remain on the dash to the left of the driver’s chair, they do not work as that electrical was demolished in this vlog.
One of two ceiling-mount vent fans are located here. This one has a rain sensor.
Front door
We installed a full tempered glass door from Home Depot. It includes built in shutters and provides fantastic visibility when driving.
The door offers keyless entry with a Kwikset Smartkey Keypad. You can easily assign multiple codes, easily change the door lock, and set it up to automatically lock.
Bunk bed cabin
We built 2 fixed bunk beds and 1 pull-out bunk bed over the wheel well in the middle of the bus. Additionally, we built a little nook with door to the right of the pull-out bunk. The kids love this for toy storage.
The custom cushions are 3 inch upholstery foam.
The bunks are built for a younger family. The stationary bunks are about 5 feet long and 3 feet wide. The lower bunk is about 4 feet long and 3 feet wide. If you had a child larger than this, we recommend they sleep on the pull-out couch in the living room.
The fixed bunk beds have 12V lights and flexible nets, which are great when the kids are sleeping or for storage when driving. The top bunk also has a narrow shelf for storage.
There is a manual 12V vent fan in the ceiling.
The window is one of two emergency exit windows (the other is in the bathroom).
Electrical Solar closet
This closet is located in the same corridor as the bunk bed cabinet, and includes all electrical and solar coming into the bus, such as electrical panel and lithium batteries.
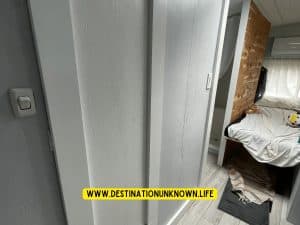
Captain’s Quarters (Rear bedroom)
The bed frame houses the fresh water tank, pump and accumulator. There is storage in the rear of the bed frame and a built-in end-table above the pump house.
When you want to change the bed from a daybed set up, it converts into a full-size bed. You’ll slide the top piece of the bed towards the cedar wall where it locks into place on a french cleat.
The custom cushions are 4 inch upholstery foam.
Custom cabinetry has been installed above the bed as well as in the closet located at the rear of the bus. The AC handler and ventless hot water heater are installed on this back wall.
The rear door can be opened. It can be best secured with a padlock on the exterior.
There is a roughly 2 foot by 2 foot skylight in this cabinet, which lets in natural light when the curtains are otherwise shuttered for privacy.
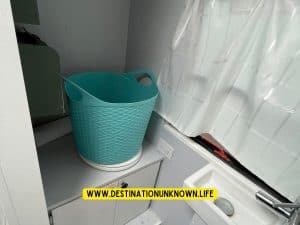
Bathroom
We installed a composting toilet, sink, light fixture above the sink and shower with bench seating. There is built in storage in the area next to the toilet.
The window is one of two emergency exit windows (the other is in the bunk bed cabin).
Composting toilet
Our system is a 5 gallon bucket with plastic bag, coconut coir for the solids and a urine diverter to the gray tank for liquids.
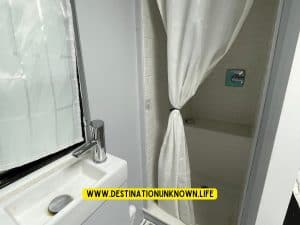
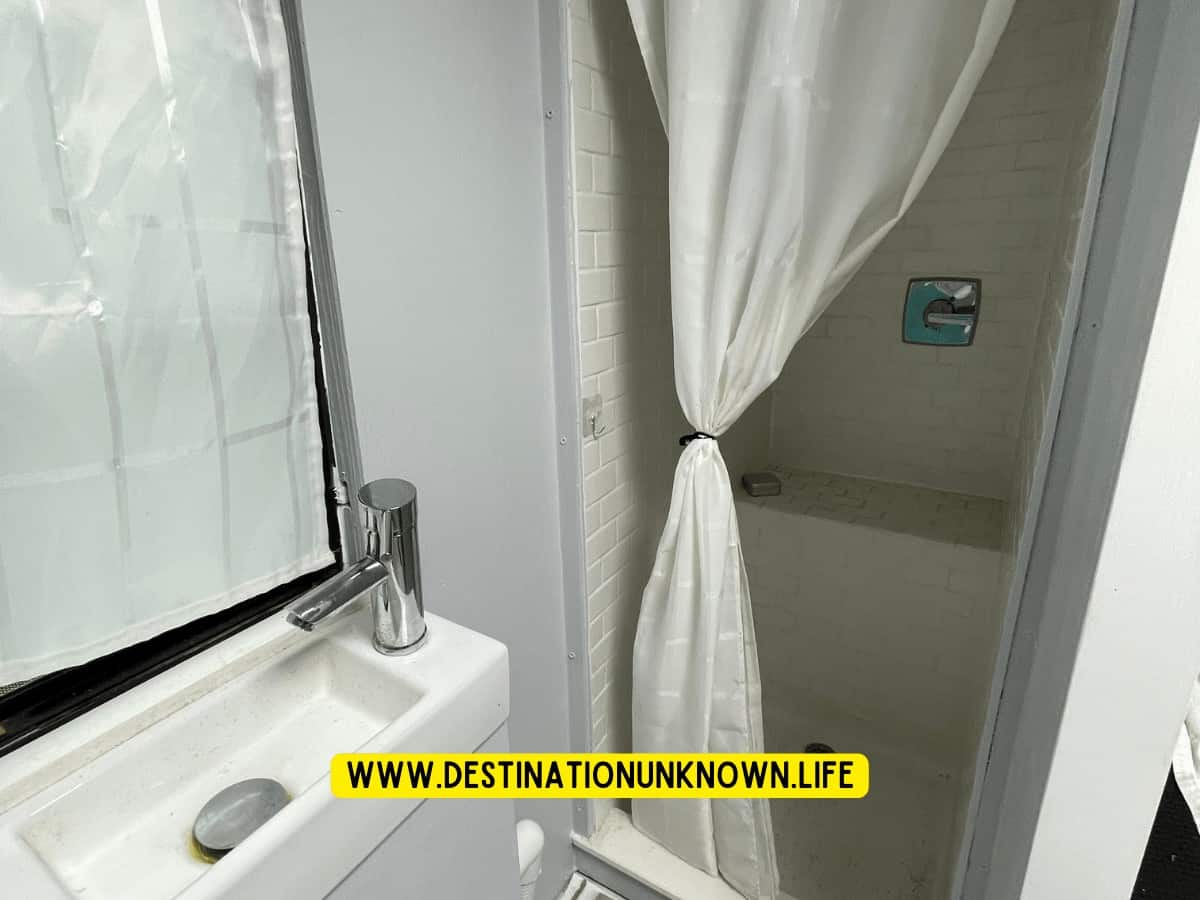
Shower
After Eric framed the shower and bench, he installed cement board for the walls and a 2 foot by 2 foot shower pan for the base.
Closed cell spray foam throughout walls and ceiling. See vlog on that installation and this vlog on clean up.
Ceramic automotive insulation on framing where it comes in place with the metal frame. See vlog on that installation.
Rigid foam in the floor
We kept the original windows, but we resealed them all in 2021.
Upgrades to limit rot and mold (reduce thermal bridge)
Vinyl (not wood) window sills.
Cedar accent walls in living room (couch), kitchen (by vertical cabinet), and captain’s quarters (feature wall).
Ceramic automotive insulation on framing where it comes in place with the metal frame. See vlog on that installation.
Safety features
Smoke & carbon monoxide detector (installed in sleeping cabin)
Propane gas detector (installed in sleeping cabin)
Fire extinguisher (in solar cabinet)
Two emergency exit windows (bathroom and bunk bed cabin)
Rear and front doors work
Three Car-seat mounting brackets (read blog on car seat installation)
Seatbelts for the two captain’s chairs
Bungee cords to secure kitchen cabinets while driving
Bungee nets to secure items in bunks while driving
Paint & Accents
In February and March 2021, Ingrid spent many hours prepping the exterior of the bus for paint. We removed all vinyl decals with a rubber wheel and reflective tape with a heat gun followed by lots of goo-gone and acetone.
Additional interior & exterior paint cans can be found in the storage bins below the bus for touch-ups as needed.
Body Paint
We choose a tintable oil-based product for automotive usage from Lowe’s. It’s similar to Rustoleum, but allowing for color variation.
We further prepped the exterior for paint by sanding and washing with a heavy duty cleaner (link product on Amazon).
After that, following the paint manufacturer guidelines, we applied a primer coat then two top coats of the colors we chose.
We chose white for the window area and dark blue for the lower part of the body. It matched our house and car – we apparently like this color combination a lot.
Vinyl Wrap
In June 2021, we teamed up with Media 1 Wrap This for our custom vinyl wrap on the exterior of our tiny home. Admittedly, a new owner may not want our brand on the bus, so I would recommend speaking with them on the best ways to remove the wrap if you want to.
Watch the wrap process by Media 1 Wrap This in vlog.
Roof Paint
In February 2021, the bus roof was lightly sanded then scrubbed with a heavy duty cleaner (link product- evergreen). It was caulked and painted using Tropicool products (bright white) recommended for high heat and sun conditions that we experience in Florida.
We used this Henry’s Tropicool product on Amazon and it has a lifetime warranty; however, we do recommend servicing and cleaning your roof and panels at least once a year to assess for leaks. It costs over $500 for a 55 gallon bucket.
The resulting finish is slightly tacky and grippy, which is nice if you have to service the panels on the roof.
In July 2021, we hired a professional painter to spray the interior. We used low VOC paint purchased at Lowe’s in a semi-gloss finish, to allow for easy clean up.
We choose a limited color palette for the interior:
flat white for the ceiling
blue-gray for the walls
bright white white for the baseboards
Frequently Asked Questions
Windows: The windows that remain are original. They were caulked and sealed in February 2021, prior to painting the exterior. See how we deleted our windows in this vlog.
Could a top bunk be removed? Yes, you could remove the top frame and give yourself more headroom on the bottom bunk.
Will the solar power the AC? No, you will need to plug into the grid in order to run the AC or use the two portable generators in tandem.
How much storage do you have on the exterior? We have 3 under-mounted storage bins that came from the manufacturer. One of the 3 bins goes back quite deep so it’s almost like a 4th bin.
Could I remove the compost toilet and replace with an all-in-one toilet like the Nature’s Head? Yes, simple pull out the frame and replace it with the toilet you want.
Is the bus being sold in As-Is conditions and furnished?Yes. Our intention is to sell the bus in As-Is condition with all fixtures, generators, water filters, and furnishings (curtains, shades, tableware, small appliances [InstaPot]), dry food storage containers, included.
Did your bus have extensive rust? No, probably because it comes from an area that doesn’t experience much snow. We treated our minor areas of rust as recommended (wire brush, Rustoleum spray paint). See that vlog here.
What size fresh water tank did you install? 100 gallons. Read this blog.
What size gray water tank did you install? 100 gallons. Read this blog.
How do you refill your propane tanks? There are securely mounted with releasable brackets in a storage bin on the right exterior of the bus (under the kitchen window). You close the valves, disconnect the hoses, and take to a center that will refill (some gas stations, RV parks, boat yards, and campgrounds offer refill stations).
In this blog, you’ll learn about our process and supplies used for building out the shower in our school bus conversion. All the steps we took were in consideration of this being a mobile dwelling and making it as water-tight as possible for the long haul. We also provide resources from trade professionals and fellow skoolie DIYers on how they made their skoolie shower.
Skoolie Shopping Essentials
Read this blog to see the product shopping list that we used to build out our skoolie!
Framing a skoolie shower is made up of two stages: rough-in and final. The rough-in stage is where you’re building the frame of the space according to your floor plan, running water lines through the walls to the valves and shower head, and drilling the sewer line. The final stage is where the walls get closed up and you can waterproof the walls, install the shower pan, connect the sewer lines, add the finishing touches such as tile and fixtures.
Rough-In Stage
Create a skoolie floor plan
Before my husband started framing, we designed a rock solid skoolie floor plan to meet our family’s needs. Read how to easily design a skoolie floor plan for floor plan resources on how to do it by hand or digitally.
Snag the free skoolie floor plan template here, if you want to draw by hand!
Frame the shower dimensions and specifications
Eric framed our shower space to be 2 foot wide (entrance) by 3 foot deep. He used 2 inch by 4 inch (“2 by 4s”) pressure treated lumber purchased at Home Depot.
Inside the shower, he built:
a 3-foot tall by 1 foot deep bench to give us a little luxurious space to sit after a tough hike
space for 2’x2′ shower pan
blocked out with wood the locations of our shower diverter kit (“shower handle guts”) and shower head
Cut more narrow furring strips for the curved shower ceiling. We would have to cut narrow pieces of cement board to form a curve.
Ran the water lines and connected them to the valves and shower head
Install the shower pan and cement board walls
After framing the structure of our bathroom, Eric installed a fiberglass shower pan on the floor. Before glueing it in place, he cut through the insulated floor and metal frame of the bus to install the sewer lines using a circular drill bit.
If you’re using a standard size shower pan like we purchased, then the hole should already be installed (usually in the center) of the pan.
Install cement board on the walls
Since the ceiling is curved, he scored the back of the cement board so it could bend. When he did need to cut through the board, he used a membrane tape to seal the edges. That’s important to do before the waterproofing membrane goes up.
Cut the cement board outside and wear a mask. You don’t want to inhale the dust.
He cut through the cement board to create holes for the shower valve kit and shower head.
Waterproof the walls
He applied mesh on the corners and then rolled three layers of waterproof product: Redguard.
Waterproofing our shower with Redguard
Final Stage
Install Tile
Next, Eric used ceramic tile adhesive (aka. mortar) to bond the tiles to the walls. He used a wet saw to cut the tiles.
We opted for a small grid horizontal subway tile on net backing for easy of installation and a little extra support on the road. Frequently, you hear of cracked grout and broken tiles when used in a mobile application, and we feel this gave us the best solution. Having the tiles on a 1 foot by 1 foot sheet, rather than individual tiles, sped up his workflow a lot.
He used a wet saw to make straight cuts and tile nipper for small cuts.
He applied the tiles using a ceramic tile adhesive (also known as mastic or thinset) and a trowel (like this one from Amazon). He mixed the adhesive himself and didn’t buy the pre-mixed compound.
Once the tile were installed, he used an unsanded grout (like this Mapei product on Amazon) to seal and bond the tiles together. He also mixed it himself using a 5-gallon bucket and mixing blade and didn’t buy the pre-mixed compound.
Finally, he sealed the grout with a grout sealer. This eco-friendly one retails for ~$15.50 on Amazon. You can apply the grout sealer with a rag or sponges.
Connect water lines
After framing, before the walls went up, he connected the shower water lines to make sure there were no leaks.
Connect sewer lines
Make a snake from plumber’s putty and line the underside of the shower drain assembly. Plumber’s putty will make a seal between the pan and the drain to make sure there are no leaks there. Finally, you’ll connect the shower drain assembly to the drain line with flexible thread sealant. Unfortunately, you’ll like be working under the bus at this stage, so prepare to get a little dusty.
Here is a list of supplies that we used to do our shower tiling project. These links will take you to Amazon, but you can also find these items in local construction and tile stores. As an Amazon affiliate, I earn from qualifying purchases.
Supplies needed to connect the drain in a skoolie shower
The products below will be linked to examples found on Amazon; however, you should be able to locate them at your local plumbing supply store or contracting store like Lowe’s or Home Depot.
Protect your skoolie gray tank with a fine strainer
I recommend purchasing a fine mesh strainer (like this one on Amazon) to go over the shower and any sink drains. This is to limit particles other than liquids going down the drain that could later cause a blockage in your gray tank. Yuck!
Read the blog about how to determine what size skoolie gray water tank you’ll need.
We recommend the largest water tanks you can install. We went with two 100 gallon tanks for fresh water and gray water storage.
Frequently Asked Questions
How to waterproof a skoolie shower
Eric painted the walls with 2 coats of Redguard waterproofing membrane as you can see in this vlog here. We used Redguard to waterproof our shower; however, we used a Schluter system when installing our backsplash in the kitchen area.
Due to space constraints, we chose to go with Redguard in the shower since it was easier to “paint” in a smaller space than installing a membrane system like Schluter.
Resources
Professional
If you want to learn more about how to install tile and which products to use where, check out this FloorTechie.com blog post.
In this blog, we provide resources on how to easily design a skoolie floor plan that works for you, whether you’re traveling solo or a big family. You will get insights on what to consider in your build from fellow skoolie DIYers, things you can live without and electronic resources if pen & paper aren’t what you’re looking for. You’ll also get our free skoolie floor plan template to help you quickly start planning your build.
How much time does it take to make a skoolie floorplan?
Though the amount of time it takes you to design your skoolie floor plan varies depending on the method used (paper & pen or software) and your skill level, we can provide insight into our actual timeline.
We designed our skoolie floor plan initially with pen and dot grid paper over five hours.
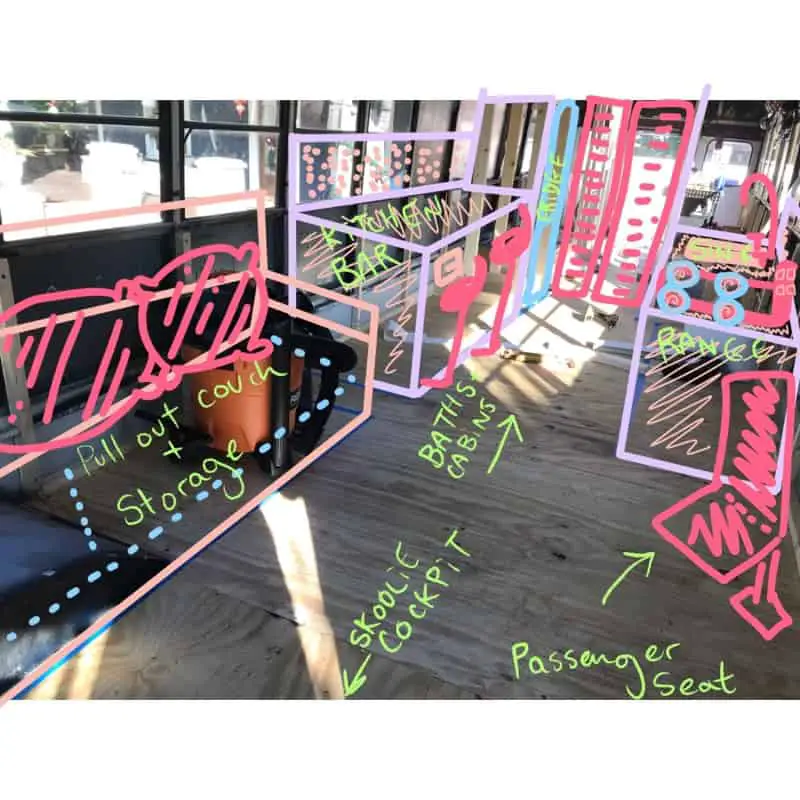
Later, after we used blue painters tape to layout our floor plan in the bus, I took a photo with my iPad then used the Procreate app to create furniture like the sofa and cabinets in the kitchen. This part was more of a labor of love and probably took me an hour of fun to draw.
As many of us have done, we spent far more time researching our design goals using tools like Pinterest.
What school bus size is right for your skoolie conversion?
Before you purchase your bus, be considerate of your goals with your skoolie. For example, if you love traveling and camping to National Parks, some restrict on the maximum size of recreation vehicle allowed in the park (27 feet usually).
We personally were unable to enter Acadia National Park in Bar Harbor, Maine with our 37′ rig; however, we were easily able to camp at a nearby RV park, Mt Desert Narrows, that didn’t have restrictions.
Designing your skoolie floorplan by hand
Free Skoolie Floor Plan Template + Bonus
As mentioned, we designed our school bus conversion floor plan with good ol’ pen and graph paper. You can watch how we did it here on our vlog.
Every square on the graph paper corresponded to 1 foot, so we used roughly 37 squares for a 37 foot bus.
I customized dot grid paper that I’m sharing here for free.
Each piece of paper has room for 3 full skoolie designs. In addition to that, you’ll get a bonusskoolie build timeline to help keep your project on schedule.
Note: If your eyesight isn’t great, you can buy larger graph paper and/or change your scale to suit your needs when drawing.
Electronic resources to design your skoolie floorplan
If you really want to make your layout electronically, we totally get it.
Pros to using software
Some pros to taking your design digitally is the ability to design anywhere using cloud-based software, and it can look a whole lot cleaner which is helpful when there are several people working on the build out of your tiny home on wheels.
Cons to using software
HildeBus Skoolie Floor plan designed with the Procreate app
There is always some bad with the good; some cons to consider with using software is the requirement to have internet if you’re using a cloud-based tool, the learning curve to use the software, and the cost of acquisition.
Below is a list of software tools that you can use to digitally create a floor plan that works for your school bus conversion.
The Procreate App is one of my favorite and versatile drawing tools. Though it isn’t specifically made for floor plans, we did find it helpful to take a photo of our design and draw over it to help visualize the final product.
This app runs about $10 in the Apple App store.
If you want to quickly learn how to use Procreate, I highly recommend a 1 month free trial of Skillshare here (that’s where I learned).
We used Procreate to help us visualize our build from here:
What should I consider before I design my skoolie floor plan?
Your build will require you to cut through the frame of the bus, so knowing areas that are unaccessible or too small to work in before you design will save you a lot of headache later.
We worked in some tight spaces when running our flexible water lines for plumbing and rigid black pipe for our propane lines, though no major obstructions due to good planning.
Before you create your skoolie floorplan, consider the following:
Making your water access (sinks, showers, water heater) & propane gas lines on the same side to limit the amount of product and possibility of leaks.
Installing the (usually matching size) water tanks on left & right sides of the bus to balance out the other when half full.
Important questions to ask yourself at the pre-design stage:
Will you be mounting any of the following & how many holes do you need to cut for them?
AC unit
Storage
Solar panels
Roof deck
Vent fans
Skylights
Chimney
Vented hot water heater
2 water storage containers (fresh water & gray water)
Electric
Propane or other gas tanks
Will the products you use to run plumbing, electric and propane gas be flexible or rigid?
What are the widths of the products you will use to run plumbing, electric and propane?
How many beds do you need?
How much personal and food storage do you need?
What will your dining space look like?
What will your couch look like? Will it turn in to sleeping quarters?
Will you be following RV code during your build out, primarily for electrical, solar and plumbing rules?
After you design your floorplan, do this:
HildeBus Skoolie Floor
Walk through your bus after the interior has been demolished, and mark out the floor plan with removable painters tape. This allows for flexibility if plans change.
Once the tape is down, check the undercarriage, roof and exterior to make sure there are no barriers or tight spaces that will affect framing, plumbing or electric.
Double-check all measurements.
Is there any “dead space” that can be used? We made cut-outs in (otherwise dead space) by our wheel wheel for a toy storage nook.
What could we have lived without in our skoolie build?
The one thing we could have lived without would be the sink in our bathroom. It’s really tiny small, though great for our small kids; however, we could have saved a few feet and not bothered with it at all.
What do we wish we had installed?
Real doors separating the cabins and bathroom! We’ve spent a lot of time being in really close quarters – having some privacy is needed and curtains just don’t do it well enough.
Also, a better storage system for our coconut coir for our composting toilet would be lovely. The storage bin we used emptied very quickly for the size family we had, though it looks great in pictures!
Skoolie build resources
Below are resources to other people who have built a skoolie and how they designed their floorplan.
Thanks for following our journey. – Ingrid & the HildeFam
*As an Amazon associate, I earn from qualifying purchases. There may also be other affiliate links in this post and our family may earn a small commission from them if you click. Thank you!
We purchased the same size gray water tank as we did fresh water tank in our skoolie, and don’t regret it. We are a family of five (2 adults and 3 young kids), and we installed two 100 gallon tanks: one for fresh water and one for gray water. This blog will go into everything we know about determining what size gray water tank you will need for your skoolie as well as maintaining, draining and not overflowing it!
We purchased both our gray water & fresh water tanks for our skoolie from Class A online at Amazon. It arrived within a day or two of purchase straight to our doorstep.
There isn’t a big price difference between the next size down from 100 gallons.
There isn’t a huge difference in dimensions between those same same referenced above, so installation wasn’t an issue.
It’s stinky work to drain your gray water.
Living in a skoolie is relatively easy except for those normal household chores like refilling your fresh water and dumping your gray tank. As now an experienced RVer, the less time spent doing these activities means more time for things we like doing.
A word to the wise though, don’t let your gray tank overflow – it stinks (even if you treat it!).
How long does a 100 gallon gray water tank last for a family of five?
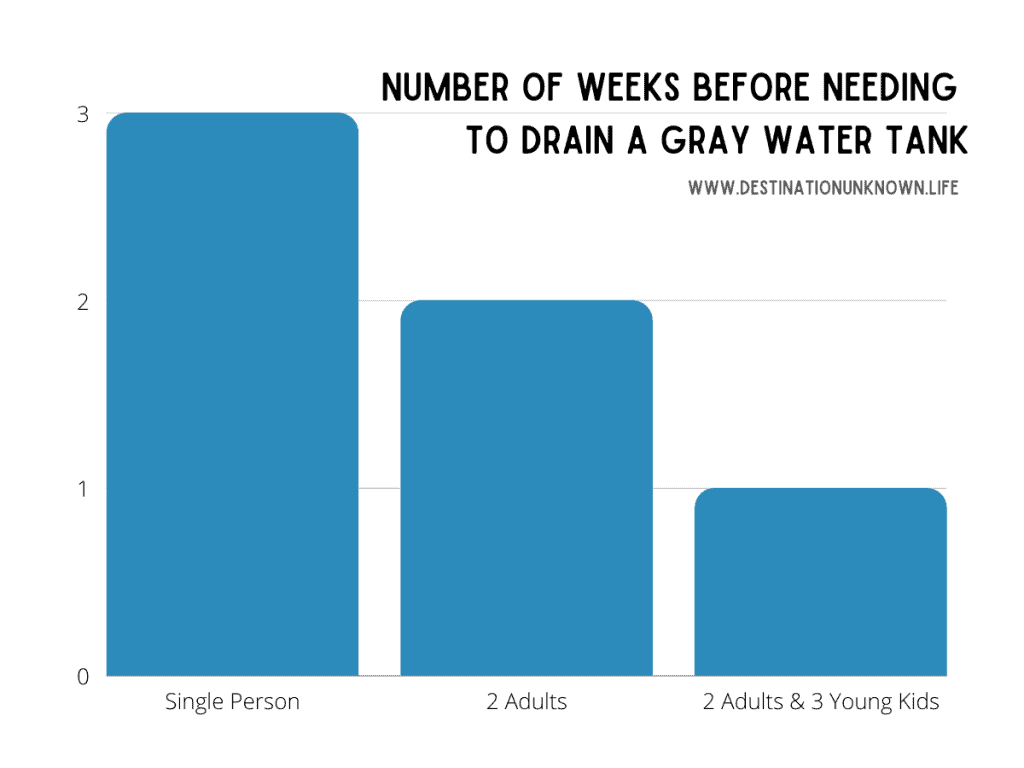
We are a family of five (2 adults, 3 young children), and we dumped our 100 gallon gray water about once a week.
For a single person, you you could probably go two to three weeks without needing to dump your gray tank.
Number of weeks before needing to drain your gray water tank, based on the number of people in the household
Where do you install your gray water tank in a skoolie?
We mounted our gray water tank underneath our bathroom area, at the left rear of the bus. Our fresh water tank is mounted on the right rear of the bus, so they balance each other out when each is about 50% full.
According to World Atlas, one gallon of water weighs 8.3 pounds. Therefore, 100 gallons weighs approximately 830 pounds.
Skoolie gray water tank maintenance
How often do you need to dump your gray tank?
In our experience, as often as we filled our freshwater tank, we needed to dump our gray tank. In theory, you will not have the same water out as the amount of water in, BUT our best practice is to fill and dump at the same time or close to to avoid overflows of the gray tank (it’s stinky!).
How much time does it take to dump 100 gallons of gray water from the gray tank?
It takes about 20 minutes to dump our 100 gallon gray water tank with the valve fully open. In hindsight, we could have installed a larger valve to let water flow out faster, but honestly it wouldn’t be a huge time saver.
Where did you dump your gray water while boondocking?
The water in the gray water tank is composed of used sink & shower water, some soap, and pee! Though a little gross, it’s completely safe to dump it basically where ever you want… though use discretion! It stinks!
Since it smells, our best practice when boondocking or being off-grid is to look for large fields or perhaps grocery store parking lots with green space or a sewer drain nearby and drain there while shopping.
What happens when your gray water tank is full?
If your gray water tank is full, it’s going to come out of the first available outlet. It’s a stinky mess when that happens so create a routine to check on water levels, treat the water to reduce odor and to dump your gray water on schedule to minimize this from occurring.
Can you leave your valve open on your gray water tank so it constantly drains?
As long as you aren’t draining right below your rig, that’s completely fine technically. Gray water stinks, even if you treat it. It’s the equivalent of standing in a puddle of old pee.
Long term stay: If you can attach a drain hose to the gray water tank valve so it drains to either a sewer (like at an RV park) or field, then this is a good option for a long term stay.
Short term stay: If you are boondocking or staying somewhere without proper dump facilities, it’s pretty unsightly to see a hose hanging out draining into the grass all the time. Dump discretely for 20-30 minutes to drain the tank, then close the valve and stow the hose.
How do you treat gray water to reduce the smell?
There were a few times when the gray tank got really full that you could smell the gases, even with the back-flow preventer in place in our plumbing. As such, we purchased a product that reduces or mitigates the bacteria smell in the tank until it can be drained. You can find this gray water treatment on Amazon.
Our best practice to reduce the smell from the gray water tank in our skoolie was to:
Scrape as much food off the plates as possible to limit what goes down the drain.
Treat the water with an environmentally-friendly deodorizer.
Drain the gray water frequently to limit the risk of overflow and odor build-up.
You don’t need much of the product to reduce or remove the odor. Be mindful that you purchase something that is environmentally-friendly, especially if you are dumping your gray water somewhere other than a sewer.
Some say you can treat gray water with vinegar but don’t make yourself suffer like we did. Just skip straight for the deodorizer or drain more frequently.