In this blog, we provide resources on how to easily design a
How much time does it take to make a skoolie floorplan?
Though the amount of time it takes you to design your
We designed our
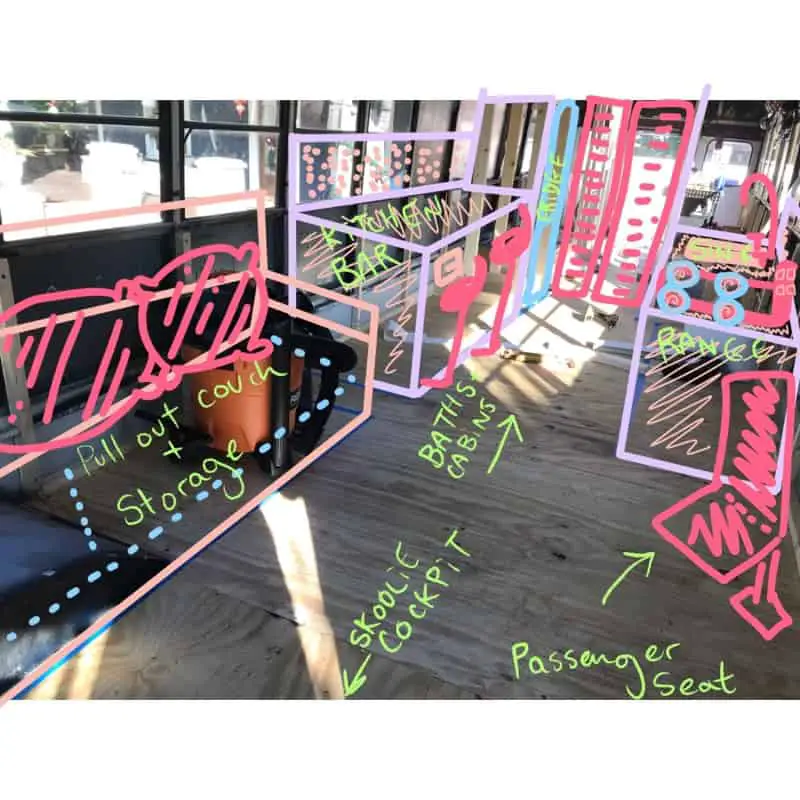
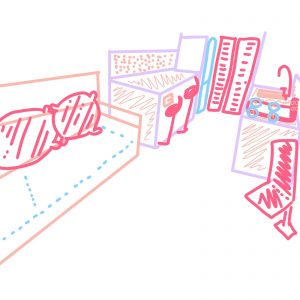
Later, after we used blue painters tape to layout our floor plan in the bus, I took a photo with my iPad then used the Procreate app to create furniture like the sofa and cabinets in the kitchen. This part was more of a labor of love and probably took me an hour of fun to draw.
As many of us have done, we spent far more time researching our design goals using tools like Pinterest.

What school bus size is right for your skoolie conversion?
Before you purchase your bus, be considerate of your goals with your
We personally were unable to enter Acadia National Park in Bar Harbor, Maine with our 37′ rig; however, we were easily able to camp at a nearby RV park, Mt Desert Narrows, that didn’t have restrictions.
Designing your skoolie floorplan by hand

As mentioned, we designed our school bus conversion floor plan with good ol’ pen and graph paper. You can watch how we did it here on our vlog.
Every square on the graph paper corresponded to 1 foot, so we used roughly 37 squares for a 37 foot bus.
I customized dot grid paper that I’m sharing here for free.
Each piece of paper has room for 3 full
Note: If your eyesight isn’t great, you can buy larger graph paper and/or change your scale to suit your needs when drawing.
Electronic resources to design your skoolie floorplan
If you really want to make your layout electronically, we totally get it.
Pros to using software
Some pros to taking your design digitally is the ability to design anywhere using cloud-based software, and it can look a whole lot cleaner which is helpful when there are several people working on the build out of your tiny home on wheels.
Cons to using software
There is always some bad with the good; some cons to consider with using software is the requirement to have internet if you’re using a cloud-based tool, the learning curve to use the software, and the cost of acquisition.
Below is a list of software tools that you can use to digitally create a floor plan that works for your school bus conversion.
Skoolie Floor Plan Design Software
- IKEA Kitchen Planner – Free
- SketchUp Designer (including 3D) – Free and Paid subscriptions
- Procreate App (for Apple iPad) – Paid
- Floor plan creator (for Android) – Free and Paid subscriptions
Procreate App on iPad
The Procreate App is one of my favorite and versatile drawing tools. Though it isn’t specifically made for floor plans, we did find it helpful to take a photo of our design and draw over it to help visualize the final product.
This app runs about $10 in the Apple App store.
If you want to quickly learn how to use Procreate, I highly recommend a 1 month free trial of Skillshare here (that’s where I learned).
We used Procreate to help us visualize our build from here:
To here:
What should I consider before I design my skoolie floor plan?
Your build will require you to cut through the frame of the bus, so knowing areas that are unaccessible or too small to work in before you design will save you a lot of headache later.
We worked in some tight spaces when running our flexible water lines for plumbing and rigid black pipe for our propane lines, though no major obstructions due to good planning.
Before you create your skoolie floorplan, consider the following:
- Making your water access (sinks, showers, water heater) & propane gas lines on the same side to limit the amount of product and possibility of leaks.
- Installing the (usually matching size) water tanks on left & right sides of the bus to balance out the other when half full.
Important questions to ask yourself at the pre-design stage:
- Will you be mounting any of the following & how many holes do you need to cut for them?
- AC unit
- Storage
- Solar panels
- Roof deck
- Vent fans
- Skylights
- Chimney
- Vented hot water heater
- 2 water storage containers (fresh water & gray water)
- Electric
- Propane or other gas tanks
- Will the products you use to run plumbing, electric and propane gas be flexible or rigid?
- What are the widths of the products you will use to run plumbing, electric and propane?
- How many beds do you need?
- How much personal and food storage do you need?
- What will your dining space look like?
- What will your couch look like? Will it turn in to sleeping quarters?
- Will you be following RV code during your build out, primarily for electrical, solar and plumbing rules?
After you design your floorplan, do this:

- Walk through your bus after the interior has been demolished, and mark out the floor plan with removable painters tape. This allows for flexibility if plans change.
- Once the tape is down, check the undercarriage, roof and exterior to make sure there are no barriers or tight spaces that will affect framing, plumbing or electric.
- Double-check all measurements.
- Is there any “dead space” that can be used? We made cut-outs in (otherwise dead space) by our wheel wheel for a toy storage nook.
What could we have lived without in our skoolie build?
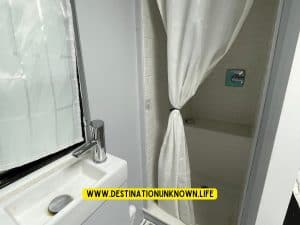
The one thing we could have lived without would be the sink in our bathroom. It’s really tiny small, though great for our small kids; however, we could have saved a few feet and not bothered with it at all.
What do we wish we had installed?
Real doors separating the cabins and bathroom! We’ve spent a lot of time being in really close quarters – having some privacy is needed and curtains just don’t do it well enough.
Also, a better storage system for our coconut coir for our composting toilet would be lovely. The storage bin we used emptied very quickly for the size family we had, though it looks great in pictures!
Skoolie build resources
Below are resources to other people who have built a

Conclusion
Thanks for following our journey. – Ingrid & the HildeFam
*As an Amazon associate, I earn from qualifying purchases. There may also be other affiliate links in this post and our family may earn a small commission from them if you click. Thank you!